Objective
For this project, you will be creating a gig poster for a hypothetical concert using a series of motifs to create interest and meaning through a poster. This poster is meant to be visually engaging, not highly informational, so your focus should be on the imagery primary, as outlined below.
Guidance
You should base the style roughly on that of Dirk Fowler (look him up). What I’m referring to mainly is the usage of strong graphic imagery (illustrations), not overly nuanced in its composition and not relying too heavily on small details. You should use detail, of course, but make sure you build a strong composition which still works when some of the detail is lost (as it will be).
You will be using three images that represent 3 different ideas/motifs, with the images being your choice. Use these three motifs:
- Fire
- Water
- Death
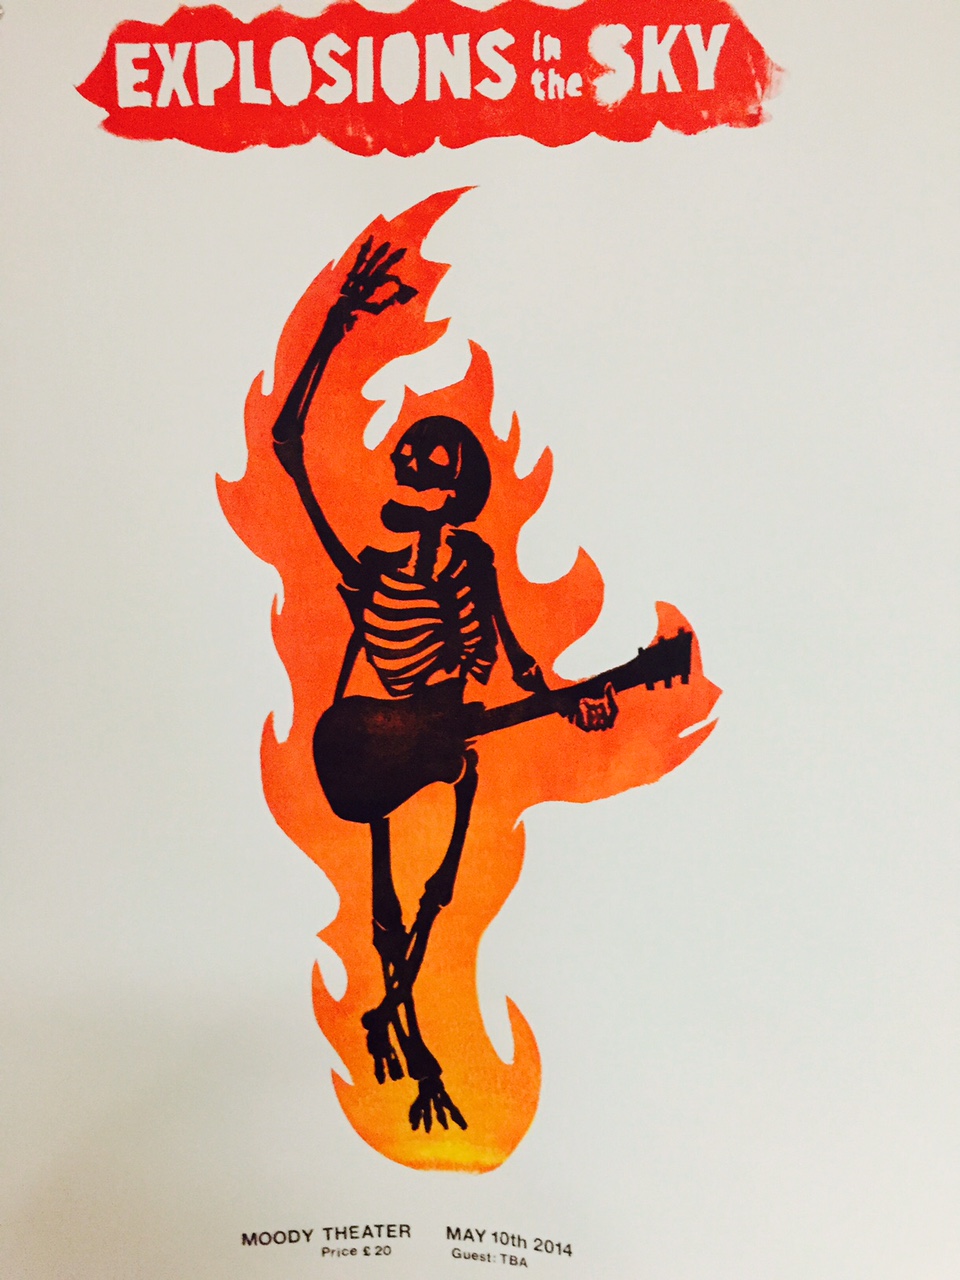
The image can be slightly abstract, but should be graphically strong, as opposed to pattern-heavy, for example. An image of a skeleton to represent death is perfectly legitimate. You will combine the three pieces of imagery that you create into a graphically strong composition that is also interesting and evocative in the juxtaposition of imagery. Below is an example of what I mean, except that it really is using two main motifs, death (skeleton) and fire (fire, yeah).
Specs
- 18in x 24in (with 1″ clearance around edge) or 12in x 18in or 9in x 12in
- Up to 2-4 colors on white paper, no gradients
Show Details
The details of the poster, so you have context (and music inspiration upon which to base the imagery) are as follows:
- MOGWAI (band)
(This text can be hand-drawn or cut, as it is likely to be large. It should be custom.) - Moudy Building (change to location of your choice)
- March 20, 2018 | 9:00 PM (Time)
- $20 (Price)
- Your informational text will ultimately be around 36pt to 72pt at the largest size option, so consider that as you sketch.
(This text should be done through printing, stamping, or another method that allows for clear information.)
Process
Step 1: Research, Sketch, Sketch, Sketch
Create 10 more detailed sketches for what will ultimately turn into your full poster, which also includes your textual content (beyond those you created for your weekly sketchbook assignment), due the following class. (Aug 30)
Step 2: Build it
Build your layout in Illustrator, remembering the medium that we’ll be working with. (Don’t flood the background with color or use lines that are 1/32inch thick.) Seek feedback.
Step 3: Make it Real
Make a poor man’s screen print. We will cover this in class.
General Steps:
- Print out the entire layout backward on the black and white printer. Tile images together if you need to, just don’t allow the printing to scale your imagery.
- In your file, separate the colors onto their own layers, and then, considering each layer a screen, flip each screen. A good way to make sure you get a reverse image is to create a box the size of your artboard on each layer as well, and select that box along with your imagery when you flip it.
- Print the layers out twice each. You’ll use one to transfer your contours and one as a guide.
- Transfer your image onto your foam, one color at a time, and cut out the pieces using an exacto.
- Cut your plexi sheet into the size you need.
- Place a full-size print the size of your screens (plexi sheets) under everything. You may have to tile this.
- Measure out and eyeball the first layer of your print, and then adhere your foam to the plexi using fixative. Complete each layer in the same way, using the first sheet you make as a guide for the others.
Step 4: Turn it In
Drop your working files and a pdf of your work (without extra junk) in the class dropbox and have your printed piece ready by the beginning of class on the due date.